Redmi Note 8 and Redmi Note 8 Pro Simple Root With Toolkit (Free Download)
Xiaomi Redmi Note 8 and Note 8 Pro released in the same period but with modified specs. Both come with Pie 9.0 version. Below root method is the Same for both mobiles unless I mentioned it as a sperate step. Only the TWRP file will differ; all other actions will be the same. If you note the specs, you don’t need root to extract the performance, unless you hate MIUI and want to flash Custom ROM. If your purpose is to disable Ads, you can do that without using the root method. I attached the link at the end of this article to do this.
If you are a regular user, you don’t need root. Xiaomi planned to optimize the In-Built apps Ads. After root, you can’t get the Official updates. Also, some exclusive features only available in MIUI ROM. Without root, you can disable Ads, Use Modified GCAM. Why I am saying this much is, Rooted mobiles require a unique approach. It can become a problem for regular users. If you are a Developer or Regular Root apps user, follow the below guide to root your mobile.
How to Root Xiaomi Redmi Note 8 and Note 8 Pro Pie 9.0
Xiaomi Redmi Note 8 Pro and regular version International Variants come with a flexible bootloader other than some locked devices. Example- In Samsung, Verizon mobiles come with locked Bootloader. This means that different smartphone variants can be easily rooted. Also, the device can accept to install TWRP recovery or any other custom recovery file/app alike.Things to check out for;
- Make sure your device battery is charged above 50%
- Backup your current files and data, full data loss process (save them on external storage).
Pre-Requirement Steps
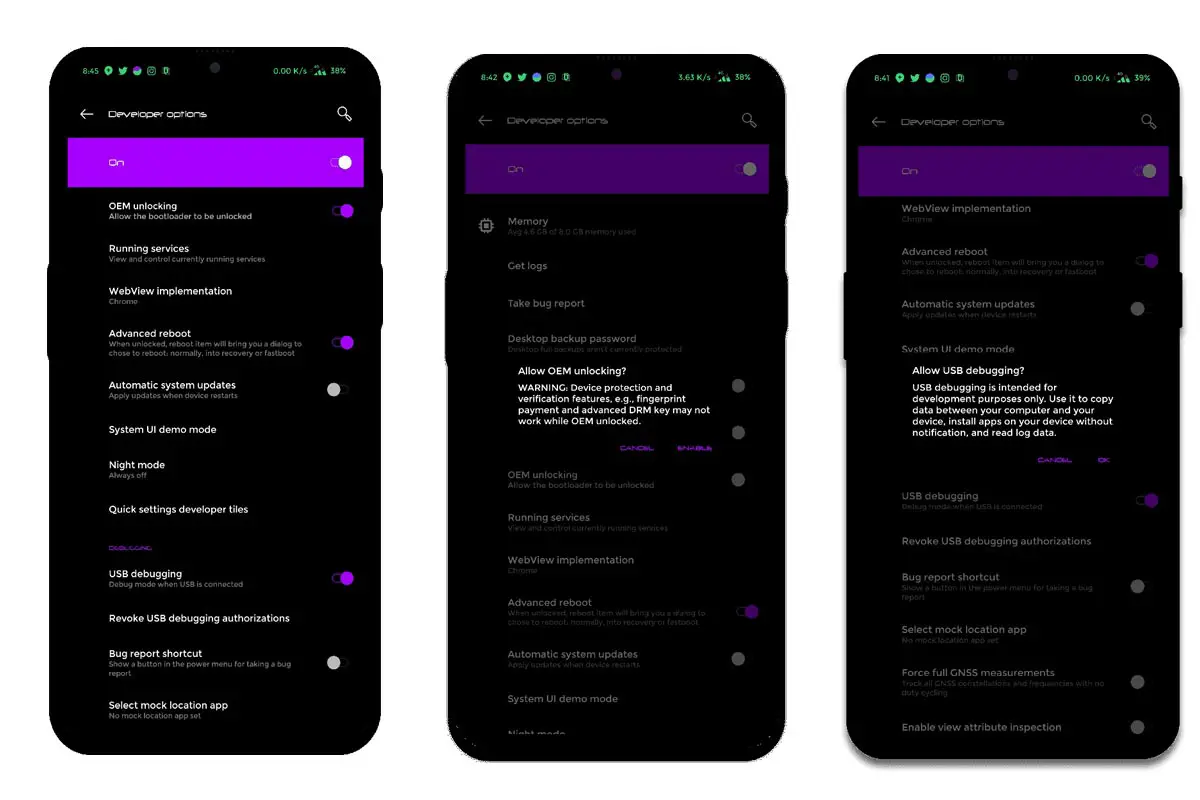
- Enable USB Debugging Mode and OEM Unlock on your mobile. To do this; go to settings >>> about >>> Tap on the “Build Number” 7-10 times consistently to enable “Developer Options,” then go to the “Developer Options” and enable USB Debugging Mode, OEM Unlock. There is no complicated process in Xiaomi Redmi Note 8/Pro.
- Also, download the ADB drivers. Install it on your PC.
- Download Magisk.Zip (Latest Version) and Copy it to Your Phone Memory.
- Download, extract, and save the TWRP Recovery on your PC and rename the recovery file to recovery.img. Copy this file to the folder where you installed ADB and Fastboot.
- For Note 8 Pro, Download ifelixit+FLASHER+TOOLKIT+Begonia.zip and follow separate steps after unlocking the Bootloader.
- Download Disable_Dm-Verity_ForceEncrypt.zip and Save it in your mobile.
Unlock Bootloader using ADB and Fastboot
- Go to the official Mi Bootloader Unlock website and log in with your Mi Account.
- Enter your Mobile details like phone number, IMEI, reason. You will get the confirmation code on your mobile. Enter the confirmation code on the Mi website and request for unlocking. You will receive a confirmation mail after the approval in 2-10 Days.
Flash TWRP on Note 8 Pro
- Connect your Bootloader unlocked mobile with PC.
- Extract downloaded ifelixit.zip file and you will find ADB and Fastboot drivers along with TWRP, .bat file.
- Run .bat as Administrator. You will get the command window Open. From that, Choose Flash TWRP (Option 1).
- After the flash move to below Magisk installation steps.
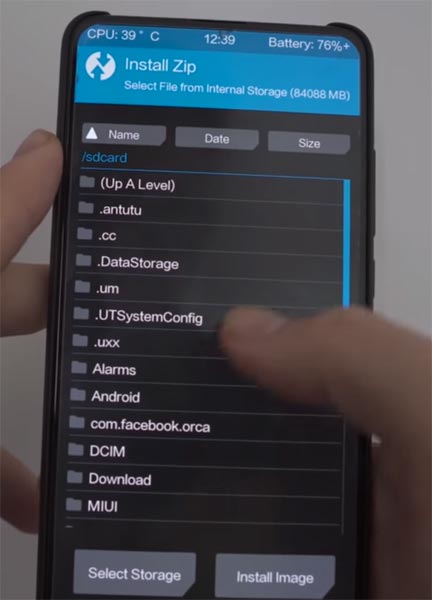
Install Magisk and Disable Dm-Verity-ForceEncrypt in your Xiaomi Redmi Note 8/Note 8 Pro using TWRP

- Select Wipe->Advance Wipe->Select Cache Data.
- Return to Home of TWRP select Install.
- Select Disable Dm-Verity-ForceEncrypt.Zip.
- After the Installation Again, navigates to Home and Select Install.
- Select Magisk.Zip. After the successful installation, Reboot your mobile.


![Unlock Tool 2025.05.26.0 Released [Latest Version]](https://blogger.googleusercontent.com/img/a/AVvXsEiA_1mHR9Qjme6xWxtbLAQYbCJgo1NMTxtb--UBNpQnALozuc8NdbG6v6xFmIvTflnrIYlGok6GLXNtOO2gf-WPzeOTMtBDj8mGjsqg_qh0YYepIVI9iy59PCionMtduI1lDZlnOflmrQd7f8BFbDpSZwxBo9WMbFuH1eE9RxoyKVG_QynmV99Ay6mRcr99=w100)


![(Reborn) SamFw FRP Tool 4.7.1[FREE] -2023](https://blogger.googleusercontent.com/img/b/R29vZ2xl/AVvXsEgLdKfLNwSumNYUp9V-5X6eYnHBQgbioy1H5UKm4GbsesLKspiQPNyQK_-fuu-EVG2Lq2zB0YETr946y2HPTT11a8GpOpwA1FxjtAqcik6CA_cY0hX_CUAIXak7UDv_r8cPSGHvVzLw3McOdlXNlc0OrU3gWfTxT4r87i5ykgNbu8xg9xqVNJbwLAR6LQ/w100/2023-05-25_084840.png)

1 Comments
thanks bro...
ReplyDeleteDo Not Send SPAM Link !!!!